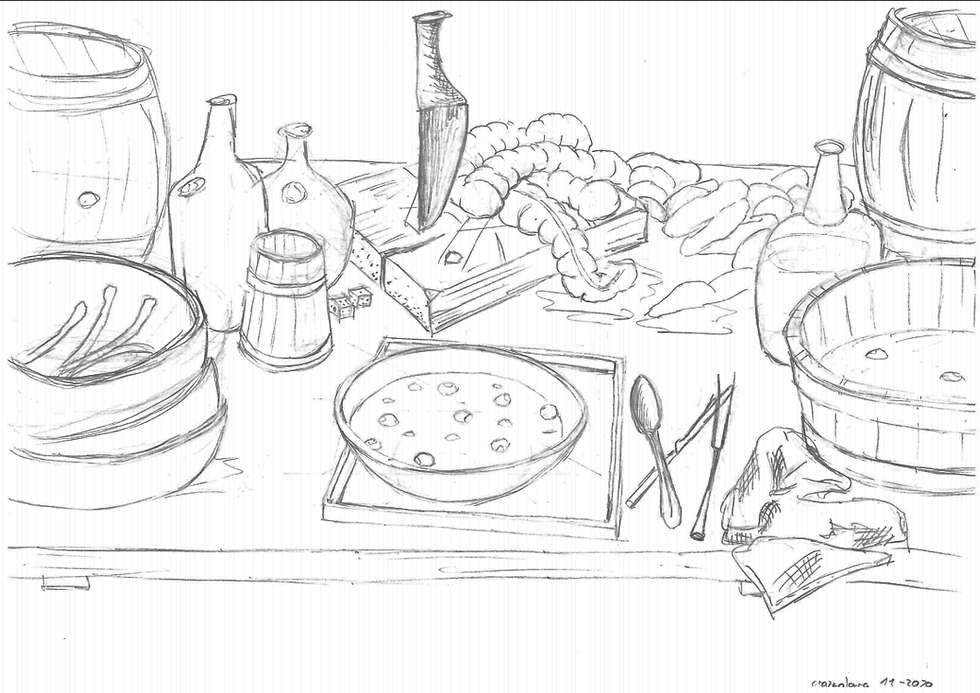
Since my last post, I’ve been busy with designing objects I want in my scene. Following my concept sketch, I must model:
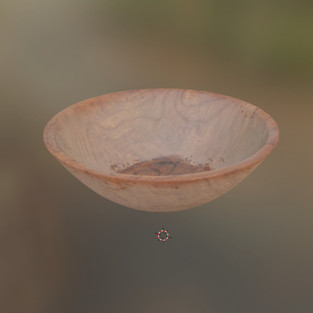
a bowl
a square plate
spoon, knife and fork
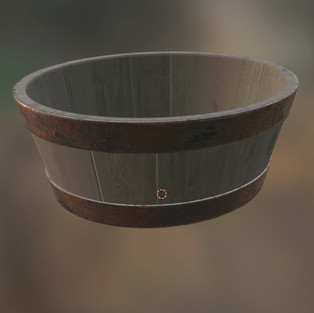
a bucket
rags
2 small barrels
3 bottles
a large chef knife
intestines
a cutting board
a mug
dice
a stack of plates
and some bones
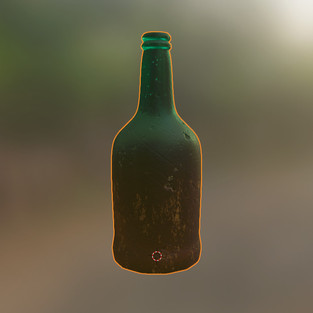
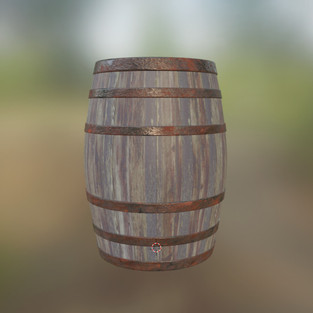
Here is what I have made so far:
Modelling
Modelling most of these went fast after some warming up. The barrels, bottles, mug, and plate are round and were, just as with the eye, based on a 12-sided circle extruded along the silhouette of my reference pictures. Then a subdivision surfaces modifier was added, and the mean crease adjusted for the sharp corners.
The barrels, mug and bucket have metal bands. I wanted these to be separate from the rest so I could give them their own material during shading. So, in editing I added additional faces by stopping to extrude the circle until the lower part of the band, extrude again until the upper part, stop, and then continue extrude. After the barrel was done, I selected those faces, duplicated and separated them, then I extruded them to the desired thickness.
The square plate could have been made by extruding a plane, but I wanted to give the walls a profile and thought it might be a good opportunity to learn something new from the blender guru by following his video on making profiles in blender: https://www.youtube.com/watch?v=Or9bMxAuICc&t=775s (see minute 10:30)
Modelling the cutlery was more challenging, but again I started of with a circle and then just extruded, scaled and deleted and reconnected vertices. The fork was modelled using this technique for the handle., but the tongs were modelled separately using a mirror modifier and then joining them in object mode together and to the handle. I noticed during the joining to the handle that the vertices of the tong’s mesh and handle’s mesh don’t integrate. Now, that’s not a problem but might be later. I’ll have to ask my tutor about it.
The intestine was modelled by joining 4 circles together and then extruding and scaling them out and in. I used a mirror modifier to safe me some time, effectively modelling 2 segments at once. Once it’s curled up the symmetry won’t be visible.
Texturing
Texturing is a real time sink for me. Most of my objects are going to be dirty and used. Each material and object have their own degradation development. For example, surfaces that get used more tend to be shinier because they get polished by the hands that touch them. Creases sit lower and there the dust accumulates and makes them mat. I would like to achieve that as close as possible.
The problem I’m facing is that most textures available online are homogeneous and clean. My solution has been to mix and match different textures and edit them in photoshop and align them to the UV map.
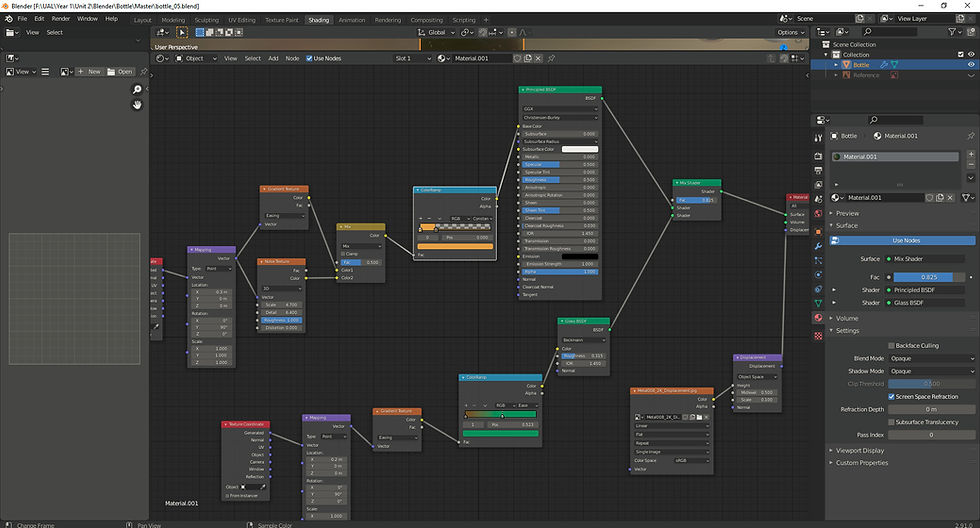
For the bottles I started out with a Glass BSDF, but I wanted to have a fade in it, as seen in my reference picture. So, I added a colour ramp (with gradient texture, mapping, and coordinates nodes). I also wanted to have some mat dirt speckles. I mixed some noise and gradient textures onto a colour ramp and fed that via a Principled BSDF into a mix node with the glass BSDF. Then added a displacement map from some scratched metal texture pack.
The chef knife I wanted to be grimy and rusty except for the blade tip which should be sharp and polished. I mixed a gradient texture via a colour ramp with two metal textures (grimy and polished metal) into the principled BSDF and adjusted the position along the blade using the mapping node. I repeated this set up without changing the variables in the mapping node and colour ramp for metallic, roughness and displacement.

For the intestine I made a custom texture in Photoshop. While playing around with filters, I discovered that there is a “make bump map” option under filtersà3D. I have been hesitant to try to make my own bump maps, considering the deadline of this project. I can’t wait to use this more if I have some time to spare and for future projects.

Bump map:

Upcoming are:
some bones
putting it all into a scene
posing the intestine with blender bones or soft body physics
cloth simulation for the rags
lighting
and finally rendering.











Comments